Posted on 13 Comments

How & Why I Began Gardening

Vegetable garden with bamboo fence, raspberry bushes, Root Pouch fabric pots lining the fence, and potting shed
The Garden of Gains

I sit here sniffling on a chilly Sunday morning in November talking with Kyla about our dreams to buy a house on expansive acreage. Somehow I’ve got her roped into this whole farming thing & I really believe we can make this work as a lifestyle, a business, and eventually, an empire.

Right now it’s just a dream, but something that I’ve been inching towards over the past 5 years that I’ve been working at AM Leonard. When I was in college I studied psychology & philosophy with intentions of becoming a psychologist, but after going through the process of writing my senior thesis – writing & working my ass off for no direct compensation –  it hit me,

“What if I put all this hard work into something business-related? How much more impact could I make on the world through a freer environment that wasn’t crippled by intellectualism & political correctness?”

Writing my thesis & working in the realm of academia forced me to change who I was on a certain level. You’re forced to remove your thoughts, feelings, and intuition in favor of objectivity devoid of any personality – and that’s just not my style. Passion has to be a by-product of the things I do in order to continue to fuel the journey into the subject.

My decision to go into business, or sales, or marketing came towards the end of my senior year of school. I really had no idea what I wanted to do but thought marketing would be a good fit. In my mind, studying psychology was the perfect field because it was the basis for everything – understanding people & developing relationships is the foundation of business & life – relating to people, knowing yourself & the value you can provide to others.

It was by luck that I ended up at AM Leonard; I had probably applied to 50+ jobs, but they were the first (legit) company to give me an interview, and eventually, my first real job.

My first real job was as an Associate Account Manager – entry-level sales – and I worked with landscapers, growers, governments, & universities to supply them with their horticultural tool & supply needs.

As time went by, I began to learn about the industry through email newsletters, articles, YouTube videos, and basically anything I could get my hands on. This fueled a lot of learning & my passion began to grow, but I realized I was still having trouble relating to growers – they seemed to be a breed of their own. It was easy to bullshit with landscapers because I had done a lot of that work, but growing was something that I didn’t know much about. So instead of just reading, I realized I had to get growing.

Something made me very hesitant about growing – maybe I was afraid to fail, maybe I was worried what people would think, but either way I got over it because I wanted to take on this challenge to learn.

Not only did I want to learn, but I was seeing that my customers were able to make a living by growing plants of all kinds – why don’t they teach you about this stuff in school? or life in general? I have always said that I wanted to be a farmer, (since at least the third grade maybe?) but I never realized it was something I could make a reality!

My first year of gardening was pretty experimental with broccoli, cucumbers, peppers, tomatoes, spinach & strawberries in Root Pouches, because my garden area at my parents’ house was on the ground where our swing set used to sit. The pea gravel was mostly scooped up, so the garden-area was a couple inches below the surrounding lawn & the ground was basically pure clay. For this reason I grew in Root Pouches (fabric pots) that I filled with potting soil.

That summer ended up being one of the rainiest years on record and my “garden” was flooded for most of the growing season. Because of this, there was a lot of disease, and eventually, a lot of weeds growing wild.

And there was nothing I could do but sit there and watch the rain fall into the pit I tried to make into a garden.

My next mission was to fill this pit & make it the Garden of Gains.

I started by hauling countless loads of top soil from my Grandparents’ house to the garden. Gradually it filled with dirt that I tilled into the clay bottom. Further soil conditioning was necessary – over the years I have added multiple bags of peat moss and perlite, ashes from the fire pit, leaves, grass clippings & several loads of horse & chicken manure.

Through loads & loads of work, I finally had a garden plot where I planted the seeds that would eventually grow into my passion & my big moonshot dream – to become a grower.

In the beginning, it was the learning & the challenge that really excited me & piqued my interest. It was like this super secret special talent of being able to grow things – and not only that – but being able to sell them & make a business out of it is incredible if you really think about it!

You quickly learn that growing things is not the hard part – it’s the keeping them alive that poses the biggest problem for most people. Growing teaches you the delicate balance of nature – you must be patient for things to grow & think long-term, while at the same time taking a proactive approach to the plant’s life by monitoring for pest or disease pressures.

It’s such a micro/macro game & that’s what I love most about growing – it’s all about managing perspective.

And that is exactly what I have done with my gardening journey. I did initially start off to learn, but then I wanted to grow flowers, starter plants, and veggies at the farmer’s market; a short-term sight.

When I actually started to grow plants, I began to realize how hard it was to grow from seed, how hard it was to keep any type of plant alive without disease or pests dominating it, how important fertilizer is, and ultimately, how this was not a get-rich-quick type of business, but something I enjoyed regardless of my results. I also realized that I had plenty of time to learn to grow, AND THEN think about going to a farmer’s market; a long-term sight.

So, as I have grown as a gardener, so too have I grown within my role at AM Leonard – the core reason why I’ve fallen down the rabbit-hole of gardening & greenhouse growing. After my first year of being an Associate Account Manager, I was promoted to Account Manager – essentially working with bigger clients & growing my account base to a larger level. My interest & passion for the green industry only continued to grow and I really enjoyed sales – not at first, but it’s something I had to grow into.

I believe that we’re all fed certain prejudices about business or sales – you instantly think of the “used car salesman” or a telemarketer – but real sales experience will give you so much empathy for those people, regardless of how pushy or horrible they are. AM Leonard did a good job of working around those objections, teaching how to provide value & be other-centered – it sounds crazy but in my first few weeks of training I felt like I learned more psychology than I did in 4 years of school. And that is because the knowledge was PRACTICAL, not simply theory, discussion groups, and assignments.

Entry-level sales was a great role to start in because I was in the trenches from the get – handling customer service calls from homeowners & professionals, calling on some of the largest growers in the nation to some of the smallest landscapers in our local area. You get a ton of requests for things that you’ve never heard of, learning things about chemicals & fertilizers that you never knew, start understanding the operations of different types of businesses & also identifying their pain points.

I began incorporating this knowledge into my own garden, slowly perfecting my methods in the same way I view my game of golf – it will never be perfect, but I can always improve. Not only did my growing methods improve, but so did my social media efforts – blogs, videos, Instagram, Facebook, and my podcast – they weren’t perfect, but I had to allow my passion to spill out into something tangible.

It is this expression of passion that I believe helped me advance my role at AM Leonard from an Account Manager to an Associate Product Manager. The title bothered me at first – “associate” – but I kind of like it now because I can just continue to climb thru the ranks. And because titles don’t mean shit.

A leader isn’t chosen because of a title, they’re chosen as a result of their actions & execution.

So now I have decided to mash my job as a Product Manager with my life as a Gardener & completely immerse myself in providing value around gardening, growing, and the healthy lifestyle communities.

Recently, I have realized that I was setting some goals too far down the road. I keep saying that I can’t wait to own acres & acres of land; I can’t wait to become a farmer; one of these days we’ll be growing x; yet I am failing to recognize that I am already a farmer – just not in the traditional sense. I grow with organic methods & grow my plants in Root Pouches – fabric pots made from recycled water bottles, using a custom-blended soil concoction that I have created that includes beneficial microbes that a natural soil would have, but this is better because it eliminates the possibility of soil-borne diseases that could already exist in your garden.

My plan has drastically shifted from owning acres & acres to pumping as much food out of my small backyard as I can. I believe that growing only in Root Pouches will increase our space efficiency in the garden & in other spots around the garden perimeter / patio area – hopefully doubling or tripling production capacity since we’re adding an additional 300 of 10/15 gallon Root Pouches.

For the 2018 growing season we were able to feed 10 people with our CSA CropBox (CSA is Community Supported Agriculture & essentially provided our customers with a bi-weekly box of fresh produce). Peppers, cucumbers onions, garlic, turnips, potatoes, and some herbs were grown in the ground, but tomatoes, carrots, lettuce, radishes, spinach, cabbage, rainbow chard, and other herbs were grown in 70-80 containers – for 2019 we should be able to add another 300 containers at our current location – PLUS I should be able to put AT LEAST that many containers at my parent’s house (where we grew potatoes last year & where the deer obliterated my Sweet Corn patch). We will fence off the corn & put the potatoes in Root Pouches – the yields will be HUGE, just wait!

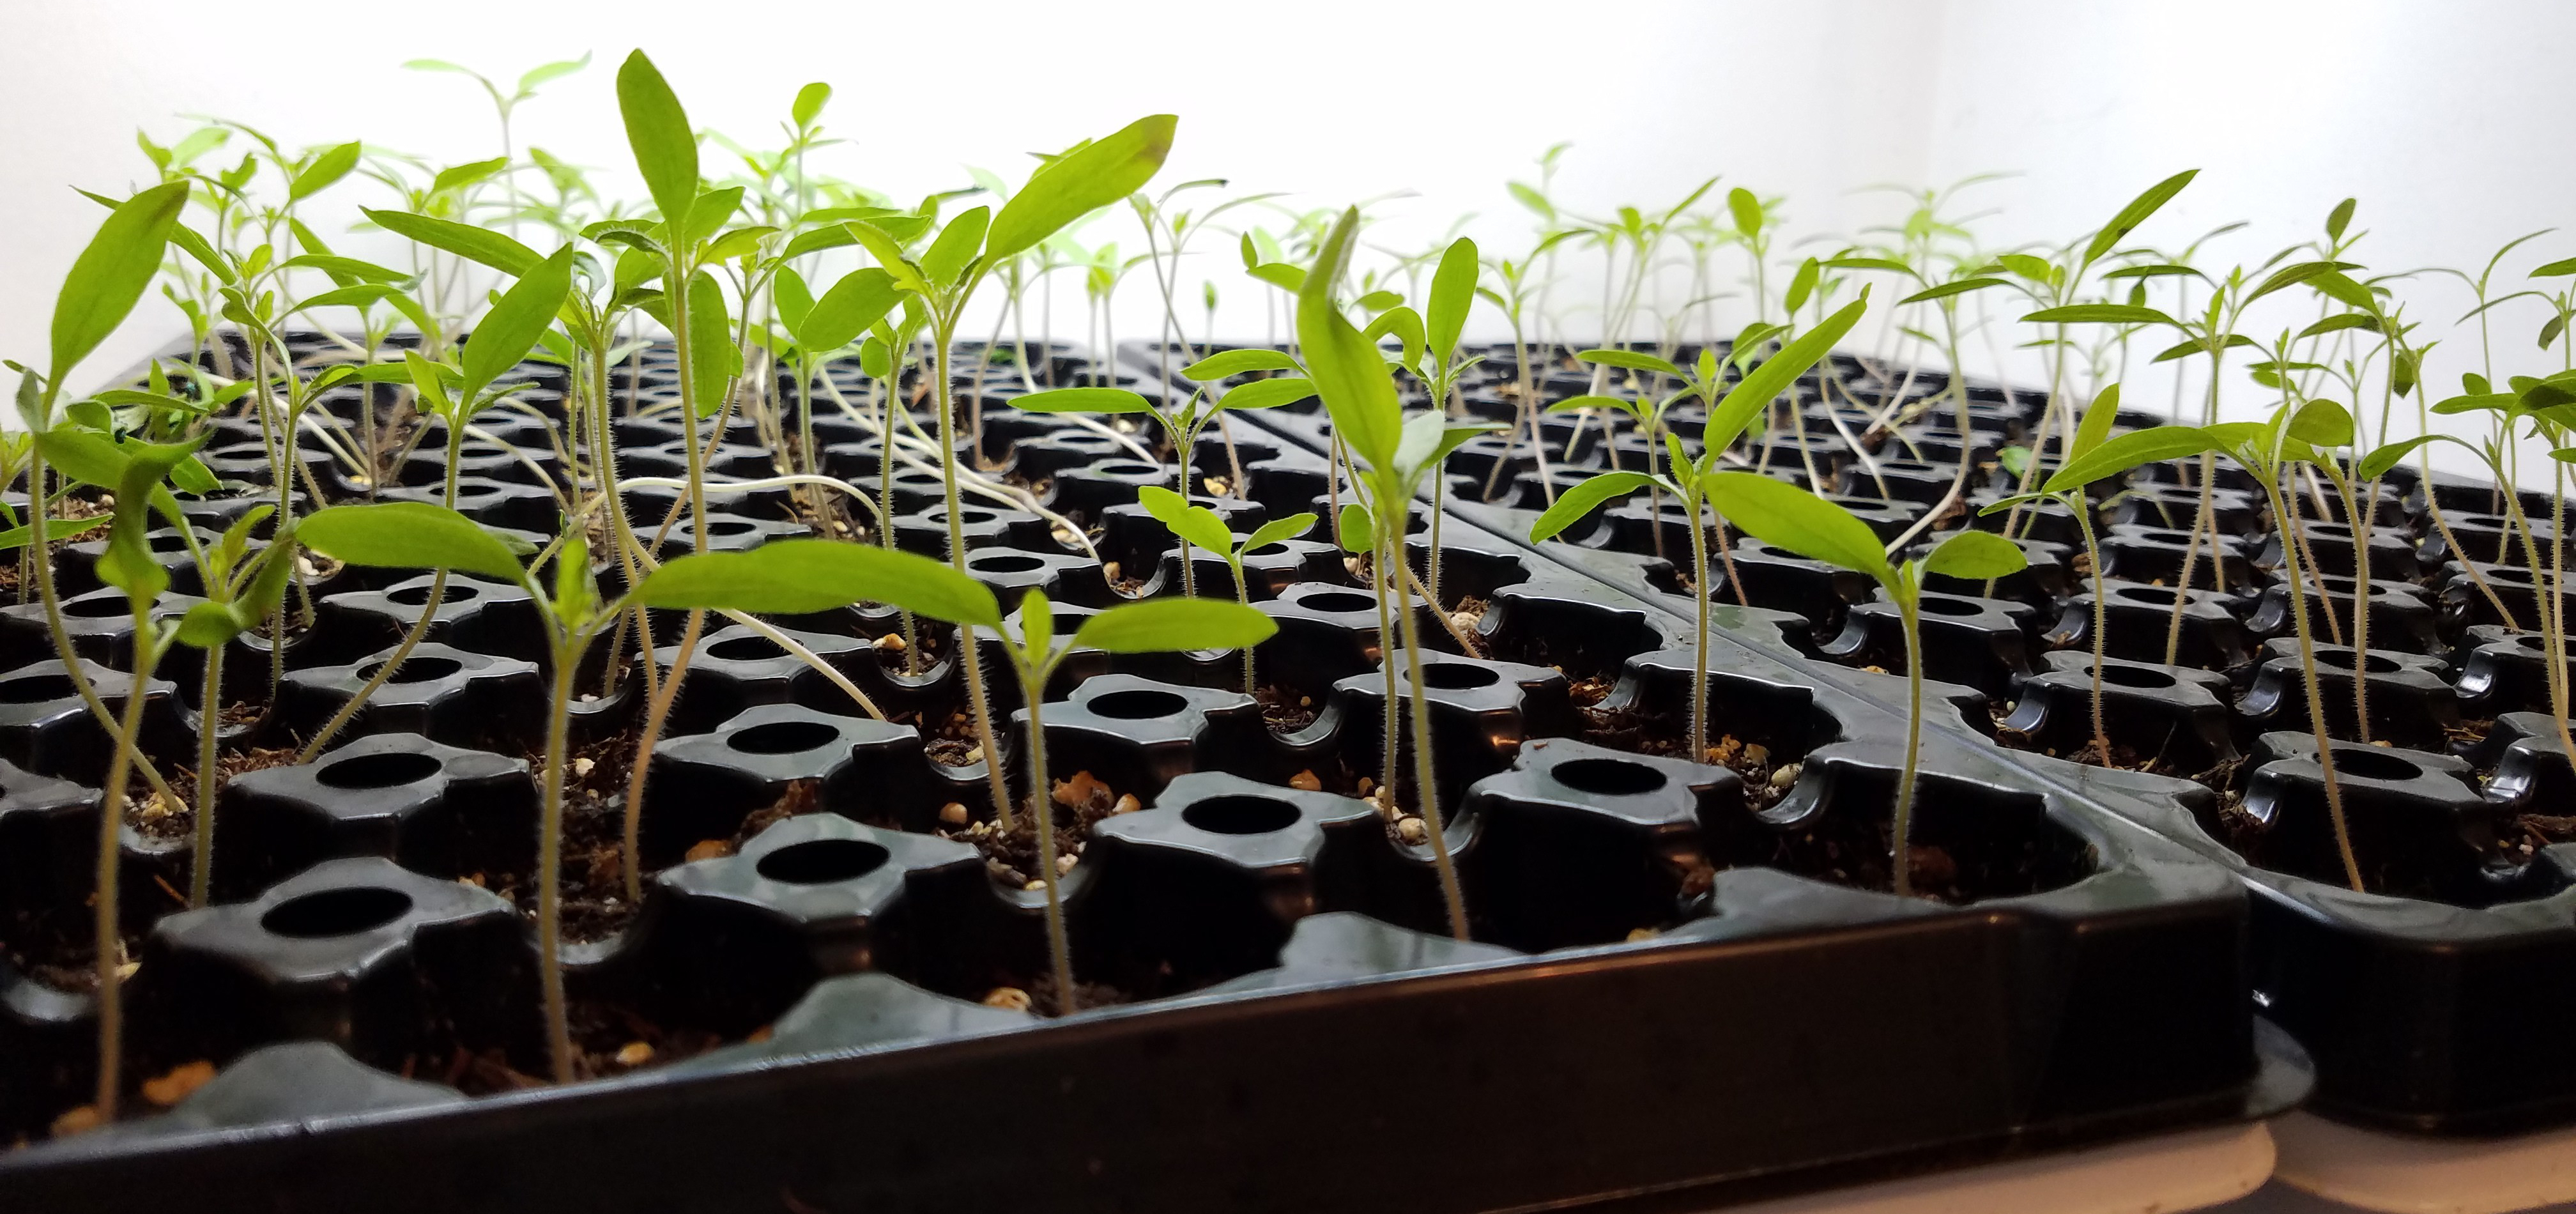
A lot of the additional containers will be optimized for succession planting of carrots, lettuce, radishes, spinach, greens, and onions. Not only will the increase in containers help, but I also have a plan to build a seed propagation rack with a sample LED grow light I got from a potential new supplier & I added some new LED lights at AM Leonard made specifically for vertical growing & propagation/seed-starting that will occupy the other shelves. We should have plenty of plugs to plant – and maybe we’ll even grow enough microgreens to begin to offer them as well!

So far here’s what I plan to offer in the CropBox this year:

  • Lettuce – Head & Leaf
  • Spinach
  • Mizuna
  • Arugula
  • Radish
  • Microgreens
  • Turnips
  • Bell Peppers
  • Tomatoes
  • Potatoes – Purple/Red/Yellow
  • Jalapeños
  • Habaneros
  • Cucumbers
  • Green Beans
  • Onions
  • Garlic
  • Basil
  • Cilantro
  • Dill
  • Sweet Corn

Our revised plans may not involve 1,000s of acres, but if you’re an entrepreneur then you can make an acre out of a 1,000 square foot garden – if there’s a will there’s a way!

Stay tuned as we document the process of our growth in the garden & within the business we’re building!

Posted on 4 Comments

4 Lessons Learned on Seed Starting

A little over one month into our seeds’ journeys & you can see that they have all taken very different paths on their journey from seed to CSA.

Evergreen Green Onions & Starhawk Lettuce were the first seeds we planted on February 12th. Both began with decent germination, but I soon saw the flaws in my methods. As the Onions & Lettuce grew, I noticed that germination was spotty, the seedlings were laying down rather than growing tall & standing and I didn’t really figure it out until I planted my 2nd round of trays – I didn’t dibble deep enough holes for the seeds & they were essentially sprouting on top of the soil. This left the roots exposed & did not provide a strong environment for survival.

Lesson 1!

Kale was another one we seeded early because it too is a cold-weather crop. We started it under fluorescent lights and it was doing okay – a little leggy because it wasn’t getting the proper amount of light distributed amongst the whole tray, but it was a whole different story once we put them under the Total Grow Broad Spectrum LED lights – mmm, real light! However, the Evergreen Onion seedlings seem to be doing amazing under the fluorescent – I’ll take it!

Lesson 2!

While everything else is thriving, I look at these empty trays and wonder, “what did I ever do to you Starhawk Lettuce, why won’t you grow!?”

IMG_20180307_172921_811.jpg

Starhawk grew great for us last year, so I can’t quite figure out the problem. At first I thought it was temperature – but even tomatoes & peppers have germinated and they typically need a warmer environment (especially Ghost Peppers) so it couldn’t be that. Then I thought it was the trays – but here’s how the Starhawk Lettuce looked in the same growing trays last year:

Lettuce sprouts
Lettuce growing in the greenhouse

So it couldn’t be the trays fault. I know I planted the first tray of seeds too shallow, but I corrected it for the second tray – and still having issues. At this point, the only thing I can think is that the leftover seeds from last year’s planting actually did hit their expiration date – I’m going to keep the faith on these bad boys & hope they decide to come around! Moral of the story, always analyze, refine, and attempt to correct issues early or preemptively if possible!

Lesson 3!

The seeds that I am the most surprised & excited about are the Tomatoes & Peppers. We planted 4 types of tomatoes & 6 types of peppers and saw germination of the tomatoes within 7 days & germination of the peppers within 10 days. Since I am growing some hot peppers including Habaneros & Ghost Peppers, I knew that I would have to add some heat to get them off to a strong start. In order to do that I put them under fluorescent lights which give off heat unlike LEDs which usually don’t add much heat to the system. And I also used seedling heat mats under the trays of tomatoes & peppers, which sped up germination like I couldn’t believe! I’ve always thought that it was hard to get Ghost Peppers to sprout, but I saw sprouts in 10 days! Maybe I’ll try another tray of lettuce & use the heat mats 🤔

Lesson 4!

Seedstarting is always a time of excitement with anticipation of spring, but more importantly, it is a time to analyze your challenges and develop a plan to dominate your garden execution. Here are the 4 lessons I’ve learned so far:

  1. Dibble holes for seeds – AKA plant seeds at the proper depth.
  2. Total Grow Broad Spectrum LED lights over everything! (Except, maybe, for onion seeds).
  3. Be aware of the challenges – analyze, refine, correct & always have an open mind to learn from mistakes rather than punish yourself for them.
  4. Seedling heat mats make life better by jumpstarting germination

Seedstarting is my favorite time of the year because I get to dive into my passion of plants & gardening and because it’s conclusion is spring! I hope this helped with your seed starting questions – leave a comment with any further questions or challenges you have and I’ll be happy to answer in the comments or on my podcast on Anchor called Plant Rant!

Posted on Leave a comment

Pruning your Raspberry & Blackberry Bushes

ripe golden raspberries

Pruning your Raspberry & Blackberry bushes is an essential & necessary task that you should complete in late winter to ensure the health of your plants, promote growth, and to optimize fruit production. You want to wait until late winter to prune your plants because the canes actually provide carbohydrates to the root system of the plants, helping the plants to better survive the harsh winter.

IMG_20171223_105639_340.jpg

So why should I prune my berry plants?

Pruning will keep your raspberry or blackberry patch from becoming overcrowded. You may think that an abundance of canes means an abundant amount of fruit, but it’s all about knowing the growth habits.

You want to keep last year’s canes that didn’t bear fruit. Those primocanes will then become floricanes – meaning they will flower & bear fruit this year.

Using loppers or hand pruners, remove any dead-looking canes and get rid of small/spindly canes as well, by cutting them at the ground level. You can also get this tutorial on my YouTube channel to see the pruning in action – here’s a link to the video.

Thin the canes so they’re about 6 inches apart & trim your rows so that they are 1.5-2 feet wide.

As far as pruning the actual canes, you’ll want to top them around 36 inches in height. This will encourage new lateral growth – which then turns to flowers – which then turns to fruit!

A lot of reading that I did also said you wanted to remove any canes that fruited in the past season. I didn’t have to worry about that with my Boyne Raspberry plants because it was only their first year growing, but the Anne Raspberry had a ton a fruit! Since those canes were not deadwood I just pruned the top of the plant that had flowered – I guess we’ll see what happens!

When you prune raspberries, you need to prune them to a flowering node (see below).

IMG_20180103_062223_349.jpg

Pruning blackberries is very similar to pruning raspberries – they’re both in the Bramble family, which includes roses as well! However, the growth habit of blackberries is slightly different.

Blackberries grow a lot like grapes – they have vines & grow up to 20 feet long! You want to keep blackberries pruned to having 5-7 vines per plant. Tip each vine at about 3 feet. Each vine will then have lateral branches – prune these to about 10-12 inches. This will promote rapid growth – and I wish I brushed up on this knowledge before I butchered my blackberry plant 😭 you can see the video here!

As I mentioned, last summer was the first time I was able to harvest raspberries from the Anne golden raspberry plant I started in the summer of 2016. The amount of fruit that we harvest was astounding!

golden raspberries
Anne Golden Raspberries

I didn’t even prune the canes from one year to the next, they got hit with a freeze after the growth cycle began in early spring, and the only “trellising” that I did was wrapping some sisal twine around the middle of the canes. Basically it was a raspberry ponytail 😂

This trellising system was apparently effective, but I just wonder how much better it will be with a legitimate trellis! In case you’re wondering what that might look like – it typically consists of wooden posts with cross-bars at 24″ height & 36″ height. Wires are then run from post to post & this provides a framework for the raspberries to grow upon.

The importance of the trellis is really 2-fold:

  1. To support the canes & to optimize fruit production.
  2. To open the canopy & allow for newly sprouted primocanes to flourish.

Trellising is important, but pruning is the real catalyst for fruit production & new growth to happen. Now that the pruning is done we will be waiting for the ground to thaw out so that we can install the trellis system – stay tuned for the blog & the video that will give you a step-by-step on how to make it happen!

If you have any further questions, drop me a line below – would love to hear from you!

Posted on Leave a comment

Documenting the Year of Growing

man climbing rice terraces

As the momentum begins to build into 2018, I’ve decided that I really want to dive into documenting my whole process of growth – both in & out of the garden.

On one hand I have a ton of goals on my plate this year. I have them broken down by category & timeframe. Personal, Work, Fitness, Nutrition, Gardening, Social, Video, Audio, & Photography are my main goals & I have Daily, Weekly, Monthly, & Yearly goals for each category.

It’s a lot, but I’m ready to execute. The time has come & gone where I piddled my time away consuming instead of creating – but it’s even beyond that – I have figured out my place in the cosmos and I have learned how to Be instead of worrying what I was going to Become.

It is pretty apparent that my passion is growing, nurturing, and continually learning in order to overcome the challenges that nature undoubtedly will force upon you. I have talked about my big dreams for the future, but in order for that to happen, we need to execute on the scale we’re at by providing the best CSA Veggie Box Subscription this side of the Great Miami River! 😂

With 10+ people ready to sign up, we have a lot of work ahead of us!

Last year I dismissed the idea of a Veggie Box Subscription because:

  1. Didn’t think I had enough growing space to execute.
  2. Wanted to save veggies for friends, family, ourselves – but we had wayyy too much!
  3. Didn’t want my passion to be tied to someone else’s expectations. I didn’t want to take the fun out of growing. I don’t grow for money, I grow because I love it!

This year I realize that this is the perfect test to see if we can pull this off!

My biggest concerns are:

  1. Not enough space to grow it all. This is a concern, but also a really fun challenge. Here’s your small ass backyard, now grow an abundance of veggies for at least 10 people! We’ll probably grow some lower-maintenance plants like potatoes & corn at my garden plot at my parents’ house. (I’m trying to talk them into letting me plant raspberry bushes along the perimeter of the property, but I don’t think they’re sold yet). Other than growing at other locations, we’ll also utilize interplanting, succession planting, container production & vertical growing systems when possible! (Stay tuned, that bolded section will have to be its own post!)
  2. Not enough production. This is a stupid worry to have, but it’s a real one! Due diligence of monitoring the fertilization and water should be enough to solve this problem though. That coupled with a good disease/pest management program will ensure a bountiful harvest.
  3. Timing. This will be as simple as following the production schedule that I’ve created, but the weather will determine a lot of this. Last year the tomatoes took forever to ripen up due to the high temperatures in July – that could delay ripening by a week or more! The good news is that we’re growing so many different things that it shouldn’t be a problem to fill a veggie void!

It’s only January, but stayed tuned! We have so much stuff Growing on that we’ll keep the Blog & YouTube busy all year long. We are getting ready to start some of the earlier seeds, like onions, within the next week. Not only are we getting the garden ready, but I’ve got some growing tips for Succulents & Orchids on the way – plus we’re getting ready to test out growing White Button & Portabella Mushroom growing kits.

There’s so much growing in my mind & I can’t wait to share it all with the world!


Posted on 4 Comments

5 Ways to Extend your Growing Season

Gardening is a great hobby – it gets you outside, keeps you active, and there’s the great reward of fresh veggies! Of course, towards the end of summer, and as we drift into the fall, we know the fateful ending of the gardening season with the coming of football & frost.

However, you are still able to grow a wide variety of things through the fall. Some crops are frost-tolerant – spinach, kale, and garlic will even be more flavorful through colder weather or after a frost! But, if you are deep into Autumn & fear a hard frost, or even a freeze, you may want to take some precautions to protect your plants – or you can drastically extend your growing season with some of the following options.

  • Frost Blankets are a great option in the beginning or end of the season to provide protection from frost. Heavyweight frost cloth offers 10° of protection, so your plants should be safe down to almost 20°! Be sure to secure the blankets to something, or hold them in place with stone or bricks so that they don’t blow away.

    Image result for frost blanket
    Credit: pineislandfeed.com
  • Low Tunnels are basically mini-greenhouses that range from 4-8 feet wide & could be 100s of feet long. These tunnels can be covered with greenhouse poly (plastic), frost blanket, or even shade cloth in the summer. Low tunnels help you get a jump-start on the season & can help to extend your growing seasons as well. If you go this route, it’s also smart to run some irrigation through the tunnels to keep everything as low-maintenance as possible.

    Image result for frost blanket
    Credit: reformationacres.com
  • Coldframes can be a more-advanced unit like this one pictured below with an arm that automatically raises to vent, to something as simple as an old window nailed onto a makeshift frame – as long as it keeps the frost off & keeps the plants above freezing, you’re good!

    Image result for coldframe
    Credit: gardenersedge.com
  • Hoophouses – A lot of people group coldframes, hoophouses, & greenhouses into the same category, but there are some distinct differences. In the grower world, coldframes would usually reference an overwintering house – or a spot where trees are stored over the winter to keep them from breaking their dormancy too early. Hoophouses are greenhouses that do not have any climate controls – they are passively heated by the sun & passively cooled by roll-up sides, doors, and other ventilation.

    Image result for hoophouse
    Credit: nrcs.usda.gov
  • Greenhouses, on the other hand, are climate-controlled grow-houses. There is heat provided from the greenhouse plastic or covering, or there is cooling by fans, evaporative cooling, control of humidity, irrigation, fertilizer – most every variable can be controlled & that’s the point – to really dial in on the growing recipe that the growers knows will yield big results.

    Image result for greenhouse
    Credit: ggs-greenhouse.com

Not everyone has the money for a greenhouse or hoophouse, but the other alternatives listed above will help you cheat death-by-frost for a few weeks at least.

There’s only a few months out of the year that we can garden successfully, so why not extend that time a little further & extend the cycle of fresh vegetables in your kitchen?

Hope this offers some beginning tips – please let me know if you have any further questions & I’ll be happy to help!

Also, check out the Gardening 4 Gains YouTube Channel here! Feel free to leave suggestions for future videos & blogs below!

Posted on 6 Comments

My Garden’s Diverse Ecosystem

This year my garden has been full of Birds, Bumblebees, Praying Mantises, Spiders & more – and that’s a good thing!

With every garden, the main concern is to grow food & you must protect it from pests, insects, and disease. In order to do this, it would normally require some sort of pesticide or insecticide – these are not always bad. In the modern world, everyone thinks that a pesticide or a “chemical” is a dangerous, cancerous thing – but in order to grow food, you have to make some decisions. Do I want to eat the literal fruits of your labors, or do you want to leave it to bugs?

Early in the growing process I used a few products to help control pests: Neem Oil, Hot Pepper Wax, and Diatomaceous Earth. All of these products are OMRI-listed & certified organic, but I took care to not spray the garden with Neem Oil or Diatomaceous Earth when flowers started emerging & pollinators began doing their work. Although Neem is safe to spray – as long as it isn’t directly on the bees – I didn’t really want to take the chance when I started noticing the intricate food web unfolding before my eyes.

Looking closely at some of my tomatoes, I began to see the start of whitefly, and also of mites, but then they would disappear after a couple days. This was due to 2 factors. The first one is the huge amount of birds that I have visiting the garden. For whatever reason, I hate birds in my garden – I thought they were just there to pick some flowers, eat my raspberries, and dig up my earthworms. A closer look revealed that they were also cleaning up the bugs from the tomatoes, cucumbers, and peppers.

The amount of pollinators in my garden has also really been astounding. I’m not a big fan of bees, but the role they play in the garden makes them a priceless asset. This year I began to really pay attention to them because of the huge push to “Save the Bees”, what is going on with them anyways, why are they dying?

(Check out this video I got of a Praying Mantis Attacking a Bumblebee!

There have been at least 6-8 different types of bees, hornets, yellow jackets, and wasps buzzing around the backyard – drunk off pollen, indulging themselves in the buffet on Boone Street. The bees may be pollinating, but the others guys (wasps, yellow jackets) have been spotted crawling along the soil or leaves of the plants – why? When you really look, you see they’re cleaning up the whitefly & the mites.

And that is the beauty of a healthy-functioning garden ecosystem – there is a true food web that is being naturally sustained!

Praying Mantis
Praying Mantises are beneficial insects & love cleaning up pests from the garden.

Posted on 4 Comments

Garlic Guide: Growing, Harvesting & Storing

It is the end of July here in Ohio. Normally it’s scorching hot & we’re dancing between 90-100 degrees at this time of the year, but this summer’s been a little cooler & a lot wetter. Since it’s getting to be July-August area, the garlic that you planted this past spring should be ready to harvest! But how do you know when the time is right to harvest your garlic? Here’s a simple guide below, plus you can check out my latest YouTube video that will give you a visual how-to guide for harvesting & storing Garlic.

Hardneck vs. Softneck

There are 2 different types of Garlic – each one has its own benefits, but the type you plant will depend on what your goals are. Below is more detailed info.

Hardneck varieties are more winter-hardy are characterized by a long, flowering stem (called a scape) growing from the middle. The scape will produce a pod that contains bulbils, which are smaller versions of garlic gloves & can be planted in the same way. Hardneck varieties form a single layer of cloves.

Softneck varieties have a stem that is softer & it is much less winter-hardy. When you see garlic braided – it is a softneck variety. This type does not have a scape that reproduces bulbils & that may be the reason that softneck can have bulbs yielding anywhere from 8-30 cloves per bulb! Compare that with hardneck varieties that typically yield 4-12 cloves per bulb – but the scape could contain hundred of bulbils!

(What is a bulbil?) A bulbil is basically a garlic seed that forms in the scape of hardneck types. They are much smaller & may take up to 3-4 years before you get a full-sized bulb!

Planting

  • Prepare beds that are 3-4′ wide, till in compost/manure and make sure beds are accessible from both sides (2 foot reach from each side).
  • Break cloves apart – the first year I grew garlic, I planted a whole bulb and didn’t realize I could have ended up with 20 bigger bulbs instead of the weird harvest I got!
  • Space cloves 4-6″ depending on the variety & how much space you want to give your plants. Closer planting may mean less weeds, but could also mean less room for your plants to grow.

Growing

Garlic really doesn’t require too much care.

  • Make sure you don’t over-water. This can lead to root rot and/or fungal issues. Water every 3-5 days.
  • Pull weeds weekly to keep the nutrients flowing to the good guys.

Pest Control

Garlic is a natural insect repellent! The smell keeps a lot a pests out of the garden ranging from bugs to deer. I like to plant Garlic & Basil with my Tomatoes to help keep everyone pest free as naturally as possible!

Harvesting

When the tops of your garlic plants begin to get yellowed, or start dying, that is the time to harvest.

  • Gently dig up with shovel, spading fork, or trowel.
  • Brush off dirt/mud.
  • Keep wrappers on bulbs in-tact.

Storing

  • Hang in cool, airy place to dry & cure for 2-3 weeks.
  • You can braid softneck varieties to save space.
  • Flavors will intensify after curing.

Growing garlic is fairly easy – the hardest part is bending over to plant & weed, but there’s not too much maintenance in-between! Garlic can store for up to 6 months, so if you planted a lot, you’ve still got time. And if you really have too much, hit up your local farmer’s market & you’ll sell out in no time.

If you have any questions or comments, please feel free to drop me a line AND please feel free to check out my most recent YouTube video on “How to Harvest & Store Garlic”.

Posted on 7 Comments

Start your Seeds!

It isn’t too late to start your seeds indoors! Spring seems right around the corner, but for us in Ohio, we’ve still got a while. The last frost date in my area is listed as April 20th, but local gardeners always go by the Mother’s Day rule for spring planting.

With that date in mind, we’ve got 8 weeks until we can plant outdoors – which just happens to be the perfect amount of time for tomatoes & peppers. Here’s a few tips for starting your seeds.

wp-1490092309643.jpg

  • Refer to your garden plan – or make a garden plan if you haven’t done so already. It’s quick & easy to do and ensures that you have enough of the supplies you need when it gets to planting time.
  • Select suppliers – there are tons of seed & seedling companies out there, do some research to find a good intersection of quality products with great pricing.
  • Determine last frost date –  this is the most important thing unless you’re growing under cover of a greenhouse, or using frost blankets. Check out your last frost date here.
  • Check planting instructions & set a planting date for each crop – this is important so you don’t have pumpkin vines growing in your closet in March!
  • Location, Conditions & Care – make sure you have a location that will get 8-12 hours of sunlight or from grow lights. Keep your seed trays in a well-ventilated area that is around 70 degrees for optimal germination. And finally, be sure that you are checking daily for water, fertilizer needs, and turning trays if seedlings are reaching.

There is nothing more satisfying than watching the seeds you’ve sown, sprout & evolve into the plants in your garden – and eventually become the salsa in your fridge!

Stay tuned for more gardening tips through the spring & season. And drop me a line if there’s something you are curious about and I’ll tackle that issue in a future post – thanks & happy gardening!

Posted on Leave a comment

Winter Gardening: 5 Steps to Planning Your Garden

Winter is a sad time for most gardeners, unless you have a greenhouse or some other structure to extend your growing season. There is always something you can do during the offseason to better prepare yourself for a successful springtime. Here are a few steps you can take, and projects you can work on to maximize your yields, minimize your waste, and Garden for Gains.

  • Pick the plants you want to grow – This seems like an easy task,but there is so much out there that you could grow! Do you want to grow fruits, vegetables, herbs, annuals, perennials, or trees or all of the above? No matter what your growing aspirations are, you can accomplish them with a plan. Research your growing zone, your last frost date, and the germination times of the seeds you select to sow.
  • Develop a farm plan with propagating, transplanting, & harvest schedules – It’s better to keep your seedlings inside or under cover until the threat of frost has passed. After that, transplant away! If you do run into a late frost you can cover your plants with frost blankets or make cloches – a mini greenhouse made by cutting a plastic bottle in half. If you plan on having a steady supply of fresh produce, then you’ll want to calculate how many trays to seed, how much space those seedlings will eventually take up, and decide how much of your space you would like to dedicate to each crop. cloche
  • Decide on a fertilization method – I think most gardeners tend to wing it in this area of gardening – spreading manure or granular fertilizer with no regard to what is actually necessary. Talk to your local Extension Agency to get a soil analysis. This will give you a true profile of the available nutrients in your soil along with the knowledge you need to supplement your plants’ needs.
  • Create a compost area – Composting is a great way to turn grass clippings, leftover food, leaves, coffee grounds, and garden waste into nutrient-rich organic matter for loosening up clay soil as well as feeding your plants & building soil microbial health. (More to come on composting in a future post!)
  • Order tools & supplies – This is the fun part, but not always the easiest. Everyone’s first instinct is to go to the big box stores like Lowe’s, Home Depot, Menards, etc. but I encourage you to go to your local garden center or nursery to get expert help from someone who also has the horticultural bug. My personal first & only stop is my place of employment AM Leonard (also have our sister company Gardener’s Edge). We have just about everything you can think of that you need to grow or landscape along with our own line of high quality tools – give us a call some time!

20160807_161852