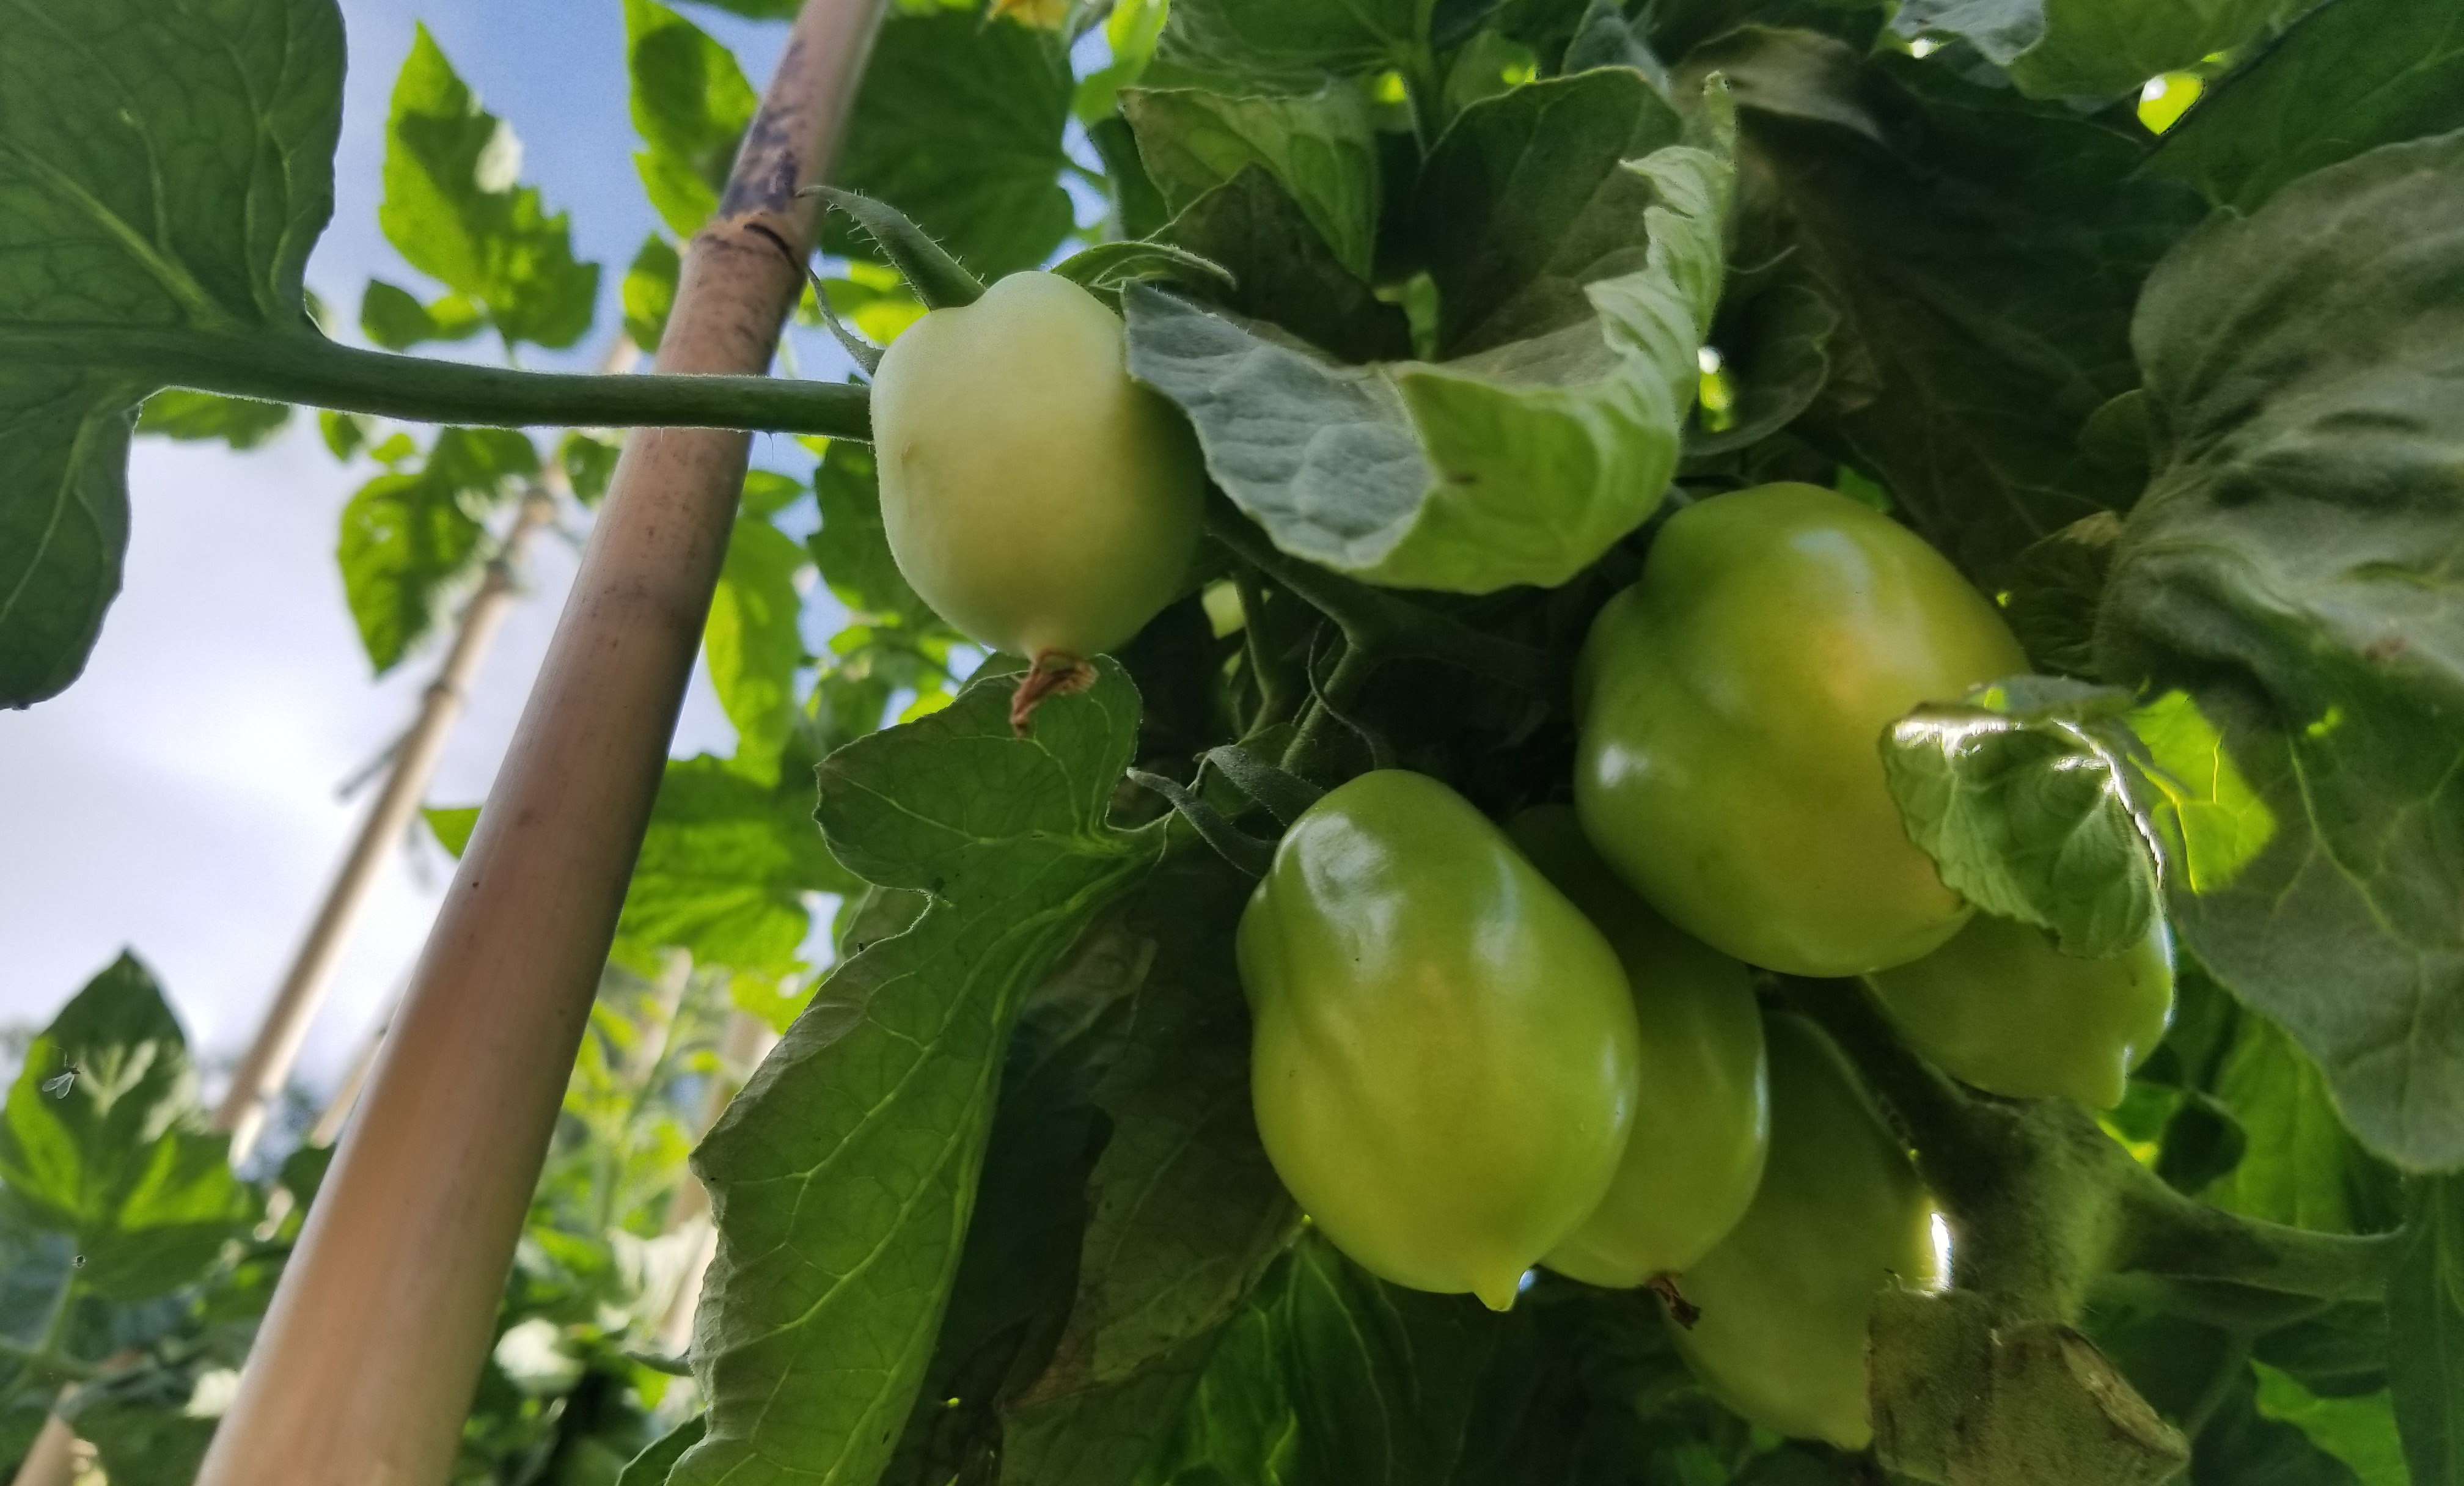
It’s the end of July, you planted your tomatoes over 2 months ago & the seed packet said you’d be able to harvest fruit in 60 days – why aren’t your tomatoes ripening & turning red?
There could be a few different factors playing a role in the ripening. But why do tomatoes turn red anyways?
Temperature – This is the biggest factor in your tomatoes ripening. Here in Ohio, we typically don’t plant until around Mother’s Day. 60 days later we are expecting tomatoes; during the hottest time of the year. For the last week it has been over 90 degrees. The chemicals that make tomatoes red – lycopene & carotene – are only produced when the temperature is 50-85°F. If you’re outside of this range, the ripening process is on hold until you get some relief from the heat!
Size/Variety – Size does matter when it comes to tomatoes ripening! I have already harvested some cherry tomatoes from rogue plants that grew from last year, but those Beefsteak tomatoes have got a ways to go! Patience, young grasshopper.
Maturity Level – A little different from the previous point and maybe this seems a little common sense. Maturity is more than just the time a tomato spends on the vine. Again, the ripening process comes down to natural chemicals. When a tomato reaches maturity, it begins producing ethylene which then reacts with the tomatoes to cause them to turn red. You can use this knowledge to save any tomatoes that may have accidentally gotten knocked off the vine – put tomatoes in a paper bag & if they’re mature enough, they should produce ethylene and ripen over a few days.
Tomatoes are a tough crop to grow, but with a little patience & cooperation from Mother Nature, you can have salsa all summer! If you have any questions on How to Grow Tomatoes – check my guide here!
It is the end of July here in Ohio. Normally it’s scorching hot & we’re dancing between 90-100 degrees at this time of the year, but this summer’s been a little cooler & a lot wetter. Since it’s getting to be July-August area, the garlic that you planted this past spring should be ready to harvest! But how do you know when the time is right to harvest your garlic? Here’s a simple guide below, plus you can check out my latest YouTube video that will give you a visual how-to guide for harvesting & storing Garlic.
Hardneck vs. Softneck
There are 2 different types of Garlic – each one has its own benefits, but the type you plant will depend on what your goals are. Below is more detailed info.
Hardneck varieties are more winter-hardy are characterized by a long, flowering stem (called a scape) growing from the middle. The scape will produce a pod that contains bulbils, which are smaller versions of garlic gloves & can be planted in the same way. Hardneck varieties form a single layer of cloves.
Softneck varieties have a stem that is softer & it is much less winter-hardy. When you see garlic braided – it is a softneck variety. This type does not have a scape that reproduces bulbils & that may be the reason that softneck can have bulbs yielding anywhere from 8-30 cloves per bulb! Compare that with hardneck varieties that typically yield 4-12 cloves per bulb – but the scape could contain hundred of bulbils!
(What is a bulbil?) A bulbil is basically a garlic seed that forms in the scape of hardneck types. They are much smaller & may take up to 3-4 years before you get a full-sized bulb!
Planting
Prepare beds that are 3-4′ wide, till in compost/manure and make sure beds are accessible from both sides (2 foot reach from each side).
Break cloves apart – the first year I grew garlic, I planted a whole bulb and didn’t realize I could have ended up with 20 bigger bulbs instead of the weird harvest I got!
Space cloves 4-6″ depending on the variety & how much space you want to give your plants. Closer planting may mean less weeds, but could also mean less room for your plants to grow.
Growing
Garlic really doesn’t require too much care.
Make sure you don’t over-water. This can lead to root rot and/or fungal issues. Water every 3-5 days.
Pull weeds weekly to keep the nutrients flowing to the good guys.
Pest Control
Garlic is a natural insect repellent! The smell keeps a lot a pests out of the garden ranging from bugs to deer. I like to plant Garlic & Basil with my Tomatoes to help keep everyone pest free as naturally as possible!
Harvesting
When the tops of your garlic plants begin to get yellowed, or start dying, that is the time to harvest.
Gently dig up with shovel, spading fork, or trowel.
Brush off dirt/mud.
Keep wrappers on bulbs in-tact.
Storing
Hang in cool, airy place to dry & cure for 2-3 weeks.
You can braid softneck varieties to save space.
Flavors will intensify after curing.
Growing garlic is fairly easy – the hardest part is bending over to plant & weed, but there’s not too much maintenance in-between! Garlic can store for up to 6 months, so if you planted a lot, you’ve still got time. And if you really have too much, hit up your local farmer’s market & you’ll sell out in no time.
Determinate vs. Indeterminate – what type is best for you?
When I first starting gardening, I had no idea about the differences in tomatoes plant types – I just wanted to grow tomatoes! There is a really big difference between the 2 plants & it is important to know these differences and how each plant should be cared for.
Determinate Tomato Plants – these are the “bush-type” varieties of tomatoes. Typically they will grow 3-4 feet tall & 3 feet wide. They do not require pruning and tomato cages are probably your best bet for plant supports – my Grandpa drives a stake in by the plant & has fencing along one side of his that keep them supported & fruiting all summer long. Determinate varieties set fruit all at once & then they are done producing for the year, unlike Indeterminate tomatoes which produce all year long.
Indeterminate Tomato Plants – these are “vining” varieties that tend to grow more vertically. Typically they will grow between 4-6 feet tall & 2-3 feet wide. They do require pruning – remove the bottom third of branches, and prune and “suckers” that emerge between the main stem & a branch. Those suckers will basically form another head to your tomato plant. You may think this is a good thing, but it will actually suck a lot of energy from the plant & is not ideal for optimal fruit production. With proper care, Indeterminate varieties will produce fruit all year long (or until the frost gets them).
Spacing
24-36″ between plants, 4-6′ between rows (room for plants to grow & accounts for 2′ walking path).
Height
Depending on type of plant, will grow 3-6′ tall, width 2-4′. That’s for the garden – some greenhouse varieties grow over 25′ tall!
Seeding
Start seeds indoors 6-8 weeks before last frost date.
Can start in trays, but I am thinking about planting seeds straight into 4″ pots from the start next year. (Anybody with thoughts on this, would love to hear it in the comments!)
Transplanting
After danger of frost has past and soil temps warm to 60°, you can transplant into the garden.
Drop a couple tablespoons of Epsom salts in planting hole to prevent blossom end rot – also provides good source of Sulfur & Magnesium.
Plant your tomatoes deep – this will help establish deep, strong roots to help support the vine’s growth.
Fertilization
I generally mix a balanced fertilizer or manure into my garden before the year. Then wait 2-4 weeks after seedlings emerge for dry fertilizer & every 1-2 weeks after flowers & fruit have set.
Sprinkle Epsom salts in planting hole & soil surrounding Tomato-tone or balanced fertilizer.
My organic pest management kit consisting of: Diatomaceous Earth, Monterey Complete Disease Control, Neem Oil, Neptune’s Harvest Hydrolyzed Fish & Seaweed Fertilizer, and my Jacto Sprayer
Cages & Stakes
Stakes
Best for Indeterminate varieties (vining tomatoes).
Place stake in ground @ time of planting to avoid harming roots later in growth cycle.
Metal – may want to use one with coating over metal to prevent hot metal on sensitive plants. These are great because they last multiple seasons.
Wood – may last a few seasons, very sturdy, solid support for plants.
Bamboo – most cost-effective & I have used them the last couple years with good results. Typically want to use one year to avoid the potential to spread disease.
Cages
Best for Determinate varieties (bush tomatoes).
Place over tomato after planting.
Cage should be 4-5 feet tall.
Be mindful of the gauge of wire being used & check the welds to make sure you’re getting a quality product!
Can be used multiple years.
Several different sizes, shapes, colors.
Trellis – Florida Weave
This is my first year using the Florida weave method – I think my mom tagged me in something about it? Or maybe I found it while looking at a customer’s website? Either way, it’s an awesome alternative to traditional staking.
Drive stakes every 4-6′, in-between the tomato plants. Use wood so that you don’t have as much flex in your stakes as I am having with bamboo!
As the plants grow they will need to be supported.
Tie twine on the end stake.
Run it along one side of the plants.
When you get to another stake, wrap the twine around the stake a few times to hold it tight.
Continue down the row.
When you get to the end of the row, go down the other side of the plants – this gives stability to both sides, and essentially creates a long, narrow tomato cage.
Keep water consistent – large amounts of water will cause fruit to split.
Containers will dry out faster than in-ground grown tomatoes & will require more attention – good opportunity for drip irrigation.
Soaker hoses should be placed ~6″ from the base of plants & buried a few inches to promote the water to spread through the soil.
Tomatoes need about 1-1.5 inches of water per week – keep them hydrated, not saturated!
General Maintenance
Pinching suckers – Indeterminate tomatoes require pruning, Determinate do not.
Notice the “suckers” growing between a branch & the main stem. These need to be pinched or clipped off to keep the plant growing vertically and to keep the plant to 1 main stem.
Pinching Flowers – It sounds counter-productive, but in the early stages of growth, you need to pinch flowers that emerge too early. Doing this will allow the plant to focus on growing in other aspects (height, leafy growth) to support the production of fruit.
Fertilize – I fertilize at time of planting by putting Epsom salts in the planting hole. This supplements plants with sulfur & magnesium, and will help with overall plant health, and help to prevent blossom end rot. Fertilize @ planting with Epsom salts & your fertilizer of choice. Then once fruit sets, fertilize every 1-2 weeks to keep them healthy, growing strong, and yielding tons of tomatoes! Fertilization after the initial planting can be done with any variety of products – the easiest way to go would be to throw some Tomato-tone Fertilizer around the base of the plant. This will be incorporated into the soil when you water & I had really great luck with it last year. This year I am testing out a hydrolyzed fish & seaweed fertilizer – plants are loving it so far!
Pulling Weeds – a necessary evil of gardening, weeding can be done while you’re already pinching suckers & pruning your plants. Weeds will suck up the nutrients around your tomatoes, so get them outta there!
Weed Management
I think pulling weeds is kind of therapeutic. It makes you stop and focus on a “mundane” task – but you know it is essential to your garden’s success, so you suck it up. But there are other options to help prevent pulling so many weeds!
Groundcover Fabric – Water-permeable material that will allow the soil to breathe, but suppress weeds. You can cut holes in the fabric where your plants will go. A lot of people will use this in conjunction with drip irrigation.
Mulch – a natural, dye-free mulch will suppress weeds & help retain soil moisture in the same way it does in your landscape & also add some organic material to your garden.
Mulch Films – similar to groundcover, this will block weeds & help retain moisture. There are also red films that are supposed to increase your yields (testing this out this summer & that will discussion will be a semi-scientific article from the research I’ve done so far).
Pest Management
You’re not the only one who wants to eat your tomatoes – here are some tips on pests & what to do to control them.
Pests include – aphids, tomato hornworms, whitefly, among many, many more.
Neem Oil – this is my favorite organic pest control product. It smells citrusy and goes to work instantly – I swear I see the bugs bolt immediately and they stay away until we get a few good rains.
Diatomaceous Earth – this is my first year experimenting with this stuff & so far it’s had really positive results. You can apply diatomaceous earth as a dusting or mix it into a slurry. I opted for the slurry and was really pleased. Even with the heavy downpours we’ve had in Ohio this summer, that stuff really sticks to the plants’ leaves. Be careful that you don’t overcoat the plants – it may prevent/restrict growth if you suffocate it. Again, this is an organic product.
Basil – plant Basil around your Tomatoes & it will help to repel some insects with its aromatic foliage.
Disease Management
Tomatoes are usually bred to have pest or disease-resistance, but that doesn’t guarantee that will be the case. There are some simple steps you can take to ensure your tomatoes will survive & not suffer from diseases or pests. The most important this when it comes to disease is not necessarily treatment, but rather, your plan should be focused on prevention.
Epsom Salts – put a few tablespoons in the planting hole. This will supply the plant with 2 crucial elements: Magnesium, and Sulfur. Along with Calcium you would call these secondary nutrients (of secondary importance to the macronutrients of Nitrogen, Phosphorous, and Potassium), but the role they plant in the plants health is critical. Calcium, magnesium, and sulfur are required by plants for normal healthy growth andhelp fortify & strengthen the cell walls (important in new growth as well as existing). The secondary nutrients basically work in conjunction with the macronutrients – helping make them more available, assisting in nutrient delivery & uptake (please drop some knowledge on me if I’m out of line saying this!)
Neem Oil – I swear, this stuff is awesome. Not only does it take care of insects & pests, but is also listed for several diseases and fungal infestations!
Copper Fungicide – Copper fungicides are considered as preventative, not curative – but so are most products. If you have gotten to a point of noticing a disease taking hold of a whole plant, you’re probably too late. Prevention is always the best method of control – it’s like putting sunscreen on before going to the beach.
Complete Disease Control – this Monterey product is a biofungicide/bactericide – bio meaning this is a live product. The active ingredient is a naturally occurring strain of the beneficial bacterium Bacillus amyloliquefaciens. This is my first year using this product, but given the fact that we’ve had buckets of rain poured over this season and my plants are still okay – is a good sign! The really great thing is that this product is so safe that you can use it up to the day of harvest – and it’s certified Organic as well!
Harvest
Leave tomatoes on the vine as long as possible, picking when fruits ripen to red.
Heavier varieties may need to be given extra support, or pulled when green. Let it ripen in a cool, dark place – not in a sunny windowsill as this may damage the skin of the tomato.
Storage
Videos will be coming in the next couple weeks as all of my tomato plants are fruiting like crazy right now! (You can see those on the [once] greatly neglected Gardening for Gains YouTube Channel – I PROMISE MORE IS ON THE WAY SOON!) If I don’t learn how to make a perfect sauce, I’ll end up buried in tomatoes from the 55 plants we have blooming.
Do not store in sunny areas (unless you want sun-dried tomatoes)
Do not store in the fridge (unless you make salsa or pico)
Salsa
Pico de Gallo
Canning – Tomato Sauces & Pastes
Freezing
Supplies needed
Seeds
Soil mix
Growing trays
Grow lights if you don’t have south-facing window for seedlings
Epsom Salts
Tomato-tone Fertilizer
Stakes – bamboo, fiberglass, steel, wood.
Plant Tying materials
Sisal/Jute Twine (Florida weave method)
Sprayer to apply fertilizers/treatments
Drip irrigation / soaker hoses / sprinklers
Canning Jars
Patience, Passion, and Persistence! I used to hate growing tomatoes, but now I just love the challenge & the reward!
Really hope that this guide has given you a somewhat detailed roadmap to successfully grow tomatoes! Please like, comment, follow AND PLEASE let me know if you have any wisdom to contribute to this tomato growing guide!
Winter is a sad time for most gardeners, unless you have a greenhouse or some other structure to extend your growing season. There is always something you can do during the offseason to better prepare yourself for a successful springtime. Here are a few steps you can take, and projects you can work on to maximize your yields, minimize your waste, and Garden for Gains.
Pick the plants you want to grow – This seems like an easy task,but there is so much out there that you could grow! Do you want to grow fruits, vegetables, herbs, annuals, perennials, or trees or all of the above? No matter what your growing aspirations are, you can accomplish them with a plan. Research your growing zone, your last frost date, and the germination times of the seeds you select to sow.
Develop a farm plan with propagating, transplanting, & harvest schedules – It’s better to keep your seedlings inside or under cover until the threat of frost has passed. After that, transplant away! If you do run into a late frost you can cover your plants with frost blankets or make cloches – a mini greenhouse made by cutting a plastic bottle in half. If you plan on having a steady supply of fresh produce, then you’ll want to calculate how many trays to seed, how much space those seedlings will eventually take up, and decide how much of your space you would like to dedicate to each crop.
Decide on a fertilization method – I think most gardeners tend to wing it in this area of gardening – spreading manure or granular fertilizer with no regard to what is actually necessary. Talk to your local Extension Agency to get a soil analysis. This will give you a true profile of the available nutrients in your soil along with the knowledge you need to supplement your plants’ needs.
Create a compost area – Composting is a great way to turn grass clippings, leftover food, leaves, coffee grounds, and garden waste into nutrient-rich organic matter for loosening up clay soil as well as feeding your plants & building soil microbial health. (More to come on composting in a future post!)
Order tools & supplies – This is the fun part, but not always the easiest. Everyone’s first instinct is to go to the big box stores like Lowe’s, Home Depot, Menards, etc. but I encourage you to go to your local garden center or nursery to get expert help from someone who also has the horticultural bug. My personal first & only stop is my place of employment AM Leonard (also have our sister company Gardener’s Edge). We have just about everything you can think of that you need to grow or landscape along with our own line of high quality tools – give us a call some time!